Solar Assistant Integration
What is SolarAssistant?
Solar assistant is a monitoring tool based the most powerful, low cost and globally available device on the planet: the Raspberry Pi. SolarAssistant provides metrics of your entire solar system live up to 2 seconds. SolarAssistant is a standalone system that can be used without the internet. However, when you are away from home, all features are available remotely via the internet.
What information is available with SolarAssistant?
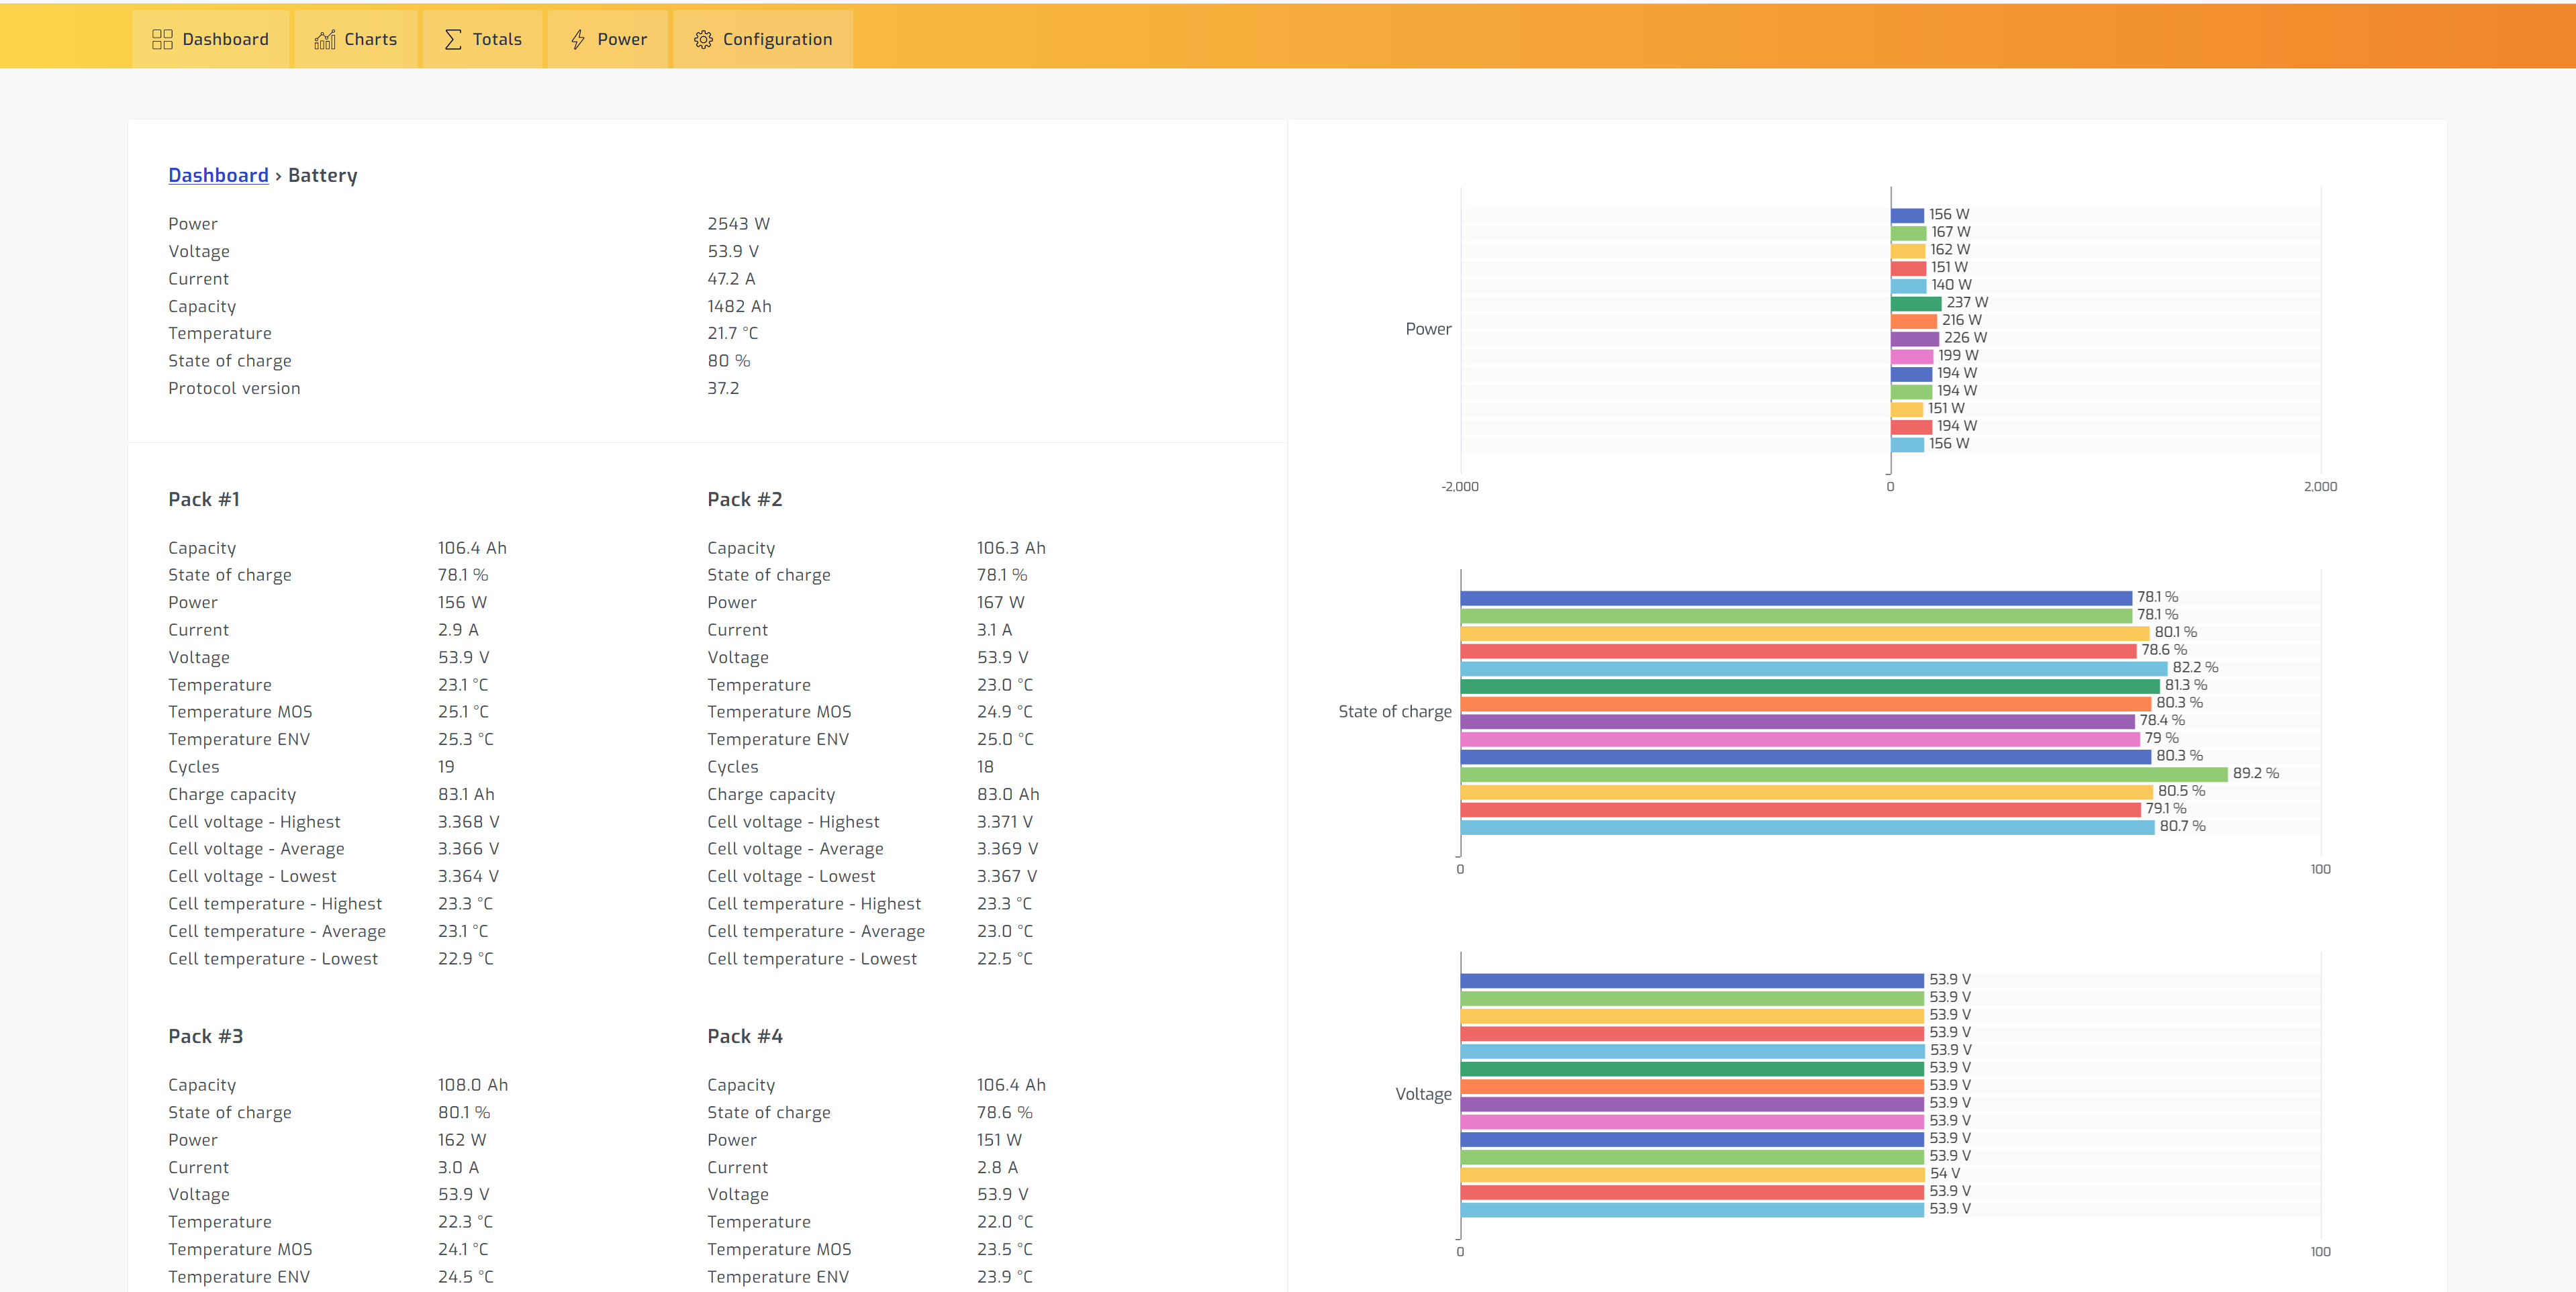
Not only can you integrate data from your inverter at the same time as your batteries, you can also get all data from your batteries – way more information than you really need to know, displayed in a neat GUI. From individual pack capacities, voltage and amperage, to temperature and cell voltages, you can have the information you need to catch a problem before it happens.

How to setup SolarAssistant:
Please note that SolarAssistant also has a guide available here if you need further documentation.
Required Materials:
- An SOK SK48v100 battery
- A Raspberry Pi of any of the following models: Zero W, Zero 2W, 3A+, 3B, 3B+, 4B. We suggest 4b or higher (PB Tech) due to the increased quantity of USB ports
- A Micro SD card (16GB recommended)
- MicroUSB adapter to provide power to the Pi. Alternatively you can use a 5v power supply. Refer to your Pi documentation for power requirements
- TIP: We use POE networking equipment at our facility, so we enjoy taking advantage of a POE hat for the Pi, because our network infrastructure has multiple backups in the event of a power outage.
- USB 2.0 to RS232 Cable for SOK Battery
- A software license for Solar Assistant, which you can purchase directly from SolarAssistant here: https://solar-assistant.io/shop/products/software
Setting up the Raspberry Pi:
- Use a PC with Internet connection to access the licensed software by logging onto your SolarAssistant account. Select the “Sites” tab from the top menu, then proceed to select the blue “Download SD card image” button on the top-left side of the page. Save this file to your computer.
- Flash the SD card, as described in the SolarAssistant documentation here: https://solar-assistant.io/help/getting-started/prepare-device
- Safely eject the SD card from your computer and insert it MicroSD port on the underside of the Raspberry Pi.
- Connect the Raspberry Pi to the local network by using one of the two following methods:
- Establish an Ethernet connection to the Raspberry Pi using the Ethernet port. Use the MicroUSB adapter to provide power to the Raspberry Pi.
-
Establish a Wi-Fi Connection to the Raspberry Pi.
- Use the MicroUSB adapter to provide power to the Raspberry Pi.
- Once the Raspberry Pi is powered, use an external device (such as a computer or smartphone) to connect to the Raspberry Pi’s self-generated Wi-Fi access point. The following SSID and password will grant access to the Raspberry Pi:SSID: SolarAssistant
Password: solar123Note: If a mobile device is being used, connection can be better established by deactivating the mobile data reception, if applicable.If a Wi-Fi access point cannot be accessed, connecting to the device via Bluetooth is a viable option as well. The device will appear on a connection list as “SolarAssistant”. - Once connected to the Raspberry Pi, open a web browser and go to the default Address: http://10.0.0.5
- Upon accessing the web Address above, you will be brought to a Configuration page with a Network settings subcategory. Provide the Wi-Fi SSID and Password of your local network.
Return to the “Sites” tab on the Solar Assistant homepage on the external device.
- Select the site for the designated device. Solar Assistant will automatically detect the Raspberry Pi connected to the local network.
- Activate your device through the “Configuration” tab to enable remote access. Select “Activate device” to activate and register the device simultaneously.
How to setup the connection to the batteries
- If you haven’t already, activate the SOK 48v100Ah battery as described in the power-up procedure.
- Connect the battery to the Raspberry Pi programmed with Solar Assistant using the SOK USB 2.0 to RS 232 adapter, by plugging the USB end into any available port on the Pi and the other end into the RS232 port of the battery.
- Access the Raspberry Pi on the local network from the “Sites” tab through the Solar Assistant main website, or by simply typing “https://10.0.0.5” into your web browser.
- Select the “Configuration” tab and locate the “Inverter” and “Battery” subcategories.
- If an inverter is connected to the Raspberry Pi for Solar Assistant, select the appropriate compatible inverter from the Models drop-down menu (a list of compatible inverters is available on the Solar Assistant homepage). If no inverter is connected, feign the existence of an inverter by selecting the “Voltronic (Axpert, MPP, Infini, etc.)” option from the Models drop-down menu, since Solar Assistant will not recognize a battery if no inverter is selected. For the Interface drop-down menu, select “USB Direct”.
- In the Battery drop-down menu, select “USB to Serial RS232/485”. In the USB port drop down menu, the only available option will be selected for you. If multiple batteries are connected, the sequence of batteries will appear in reverse order.
- Select “Connect” button to establish the connection between the SOK 48v100Ah battery with Solar Assistant.
- Success! You can now select the Dashboard, Charts, Totals, or Power menu tab to view real-time updates from your SOK 48v100Ah battery.
